
In the era of the red dot sight (RDS), iron sights still have a place. Really small guns generally cannot realistically mount an RDS. Takedown rifles (like the Henry AR-7) cannot stowaway with an optic on them. Maybe you’ve got an old gun (or a retro-reissue of one), and want to make the sights better. About half of my guns are irons-only (for one reason or another), and many of them have fixed sights. How do I paint my sights to make them better?
What We Want Out of Painted Sights
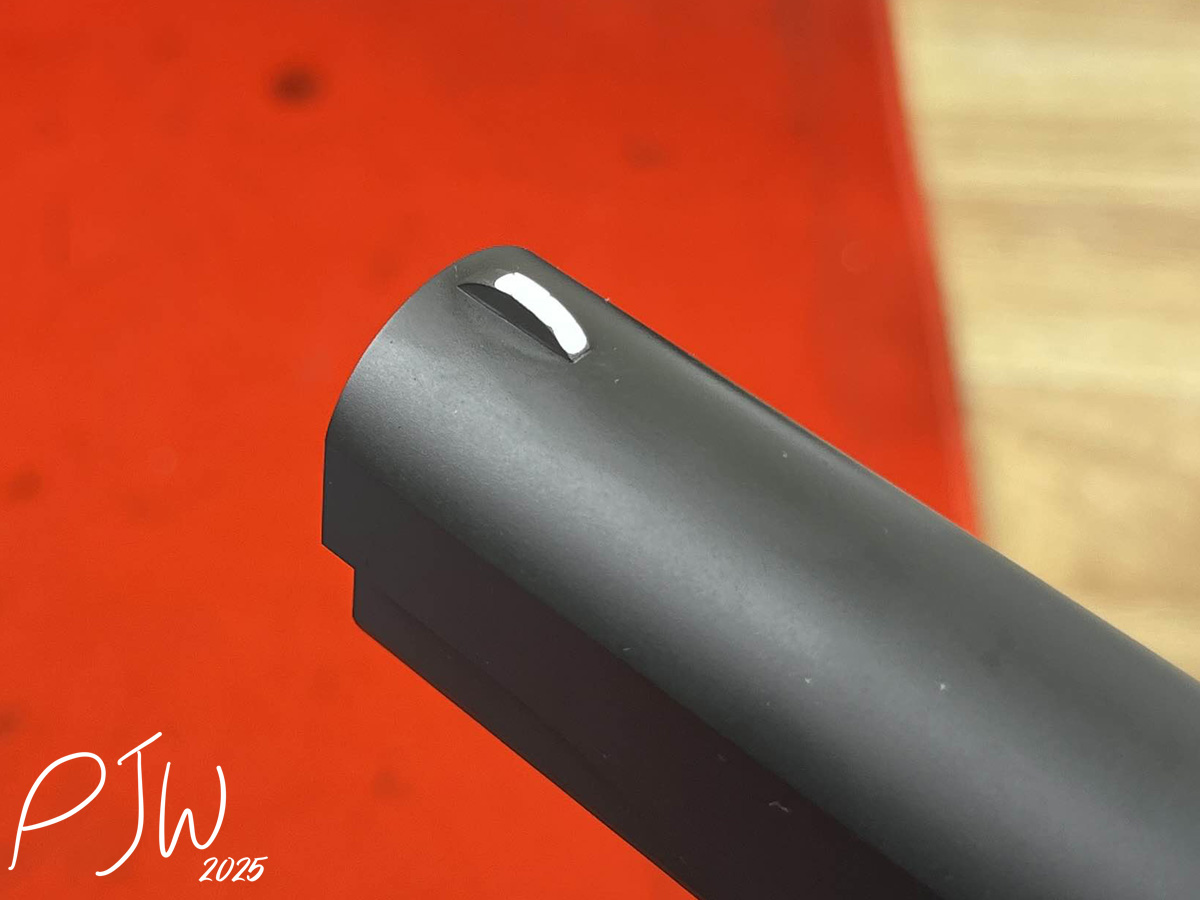
At the core of it, I want a high visibility front sight, and a non-distracting rear. My preference is a black rear, and some type of high visibility front sight (like a brass bead, tritium tube or bright matte paint). With some paint, we can certainly improve that sight picture.
The major focus here is going to be on painting the front sight. The front sight is where we focus when shooting irons (unless doing a target focus at closer range), and making it easy to see is a must. For the rear sight, it’s about making it less obtrusive, as to not get in the way of the front sight.
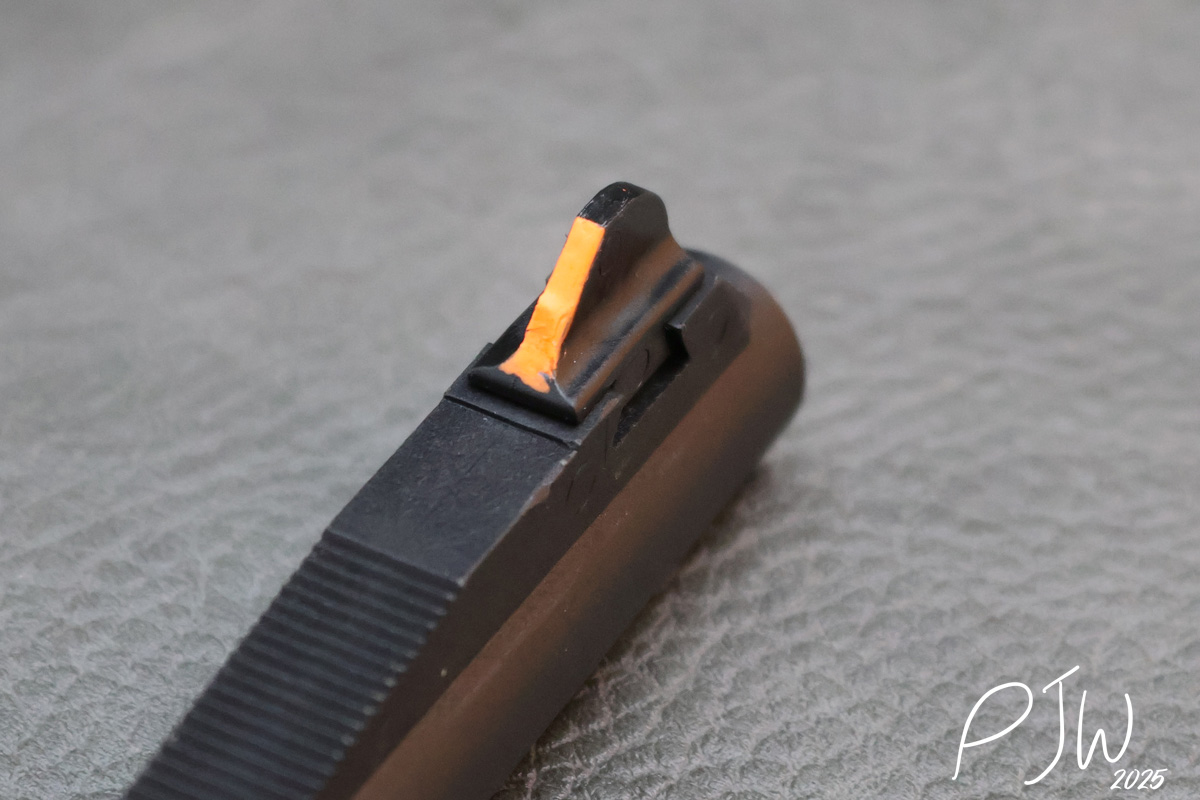
Painting the front sight is simple, and your personal preference will play a part with it. I like orange on my front sight, but I know plenty of folks who like white or red on theirs. Actually painting the sights won’t be hard, but there is a good way to do it to make it last.
The rear sight is easy to deal with, as most guns with low-visibility front sights also have unobtrusive rears. I think of guns like the GI 1911, S&W J-Frame, and many rifles in this instance. Unless that rear sight is really shiny (missing finish, weird paint job), we can just leave it be. That said, the process for painting the front sight can be used with the rear, just with different colors of paint.
What do we need to paint our sights?
Tools For Success
The list of things that we need to paint our sights is fairly short.
- Mineral spirits or alcohol (to clean the sights prior to painting)
- Rags or paper towels
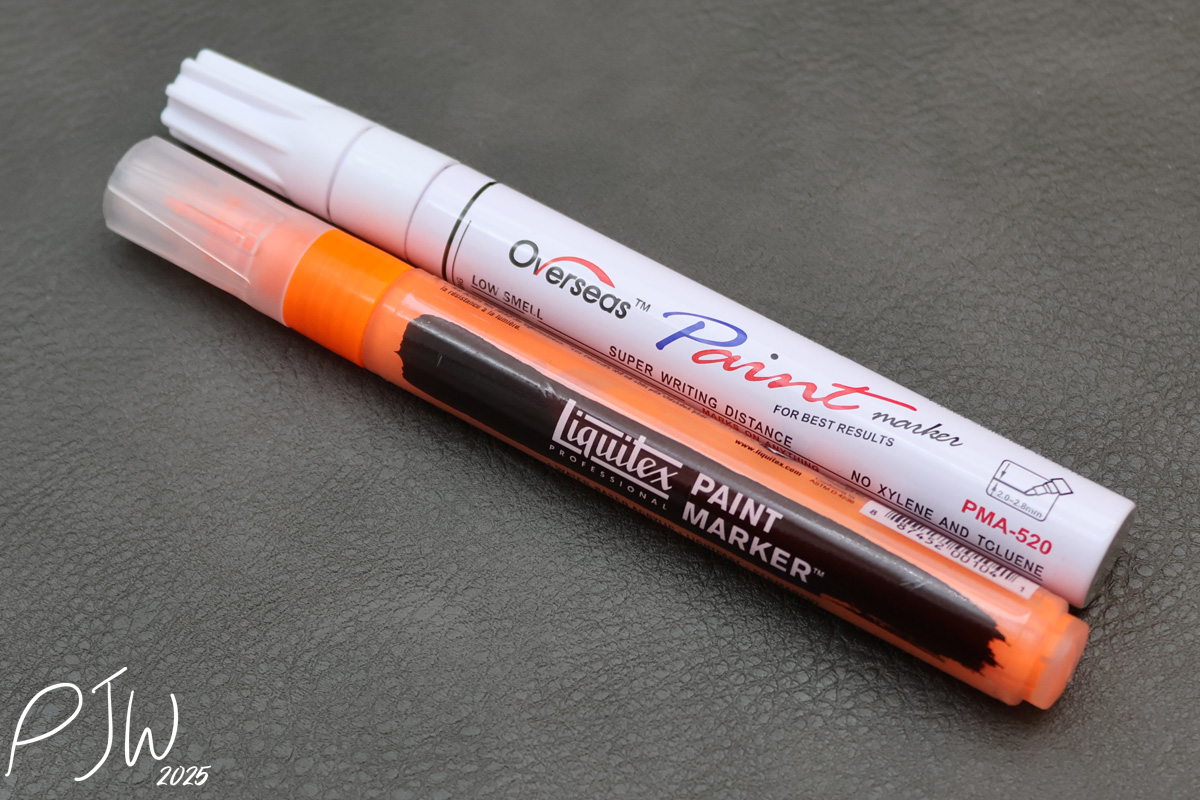
- Primer paint (pen preferred)
- Topcoat paint (pen preferred)
- Masking tape (not necessary, but good to have)
- A way to keep the gun/side from moving (vice or pistol stand)
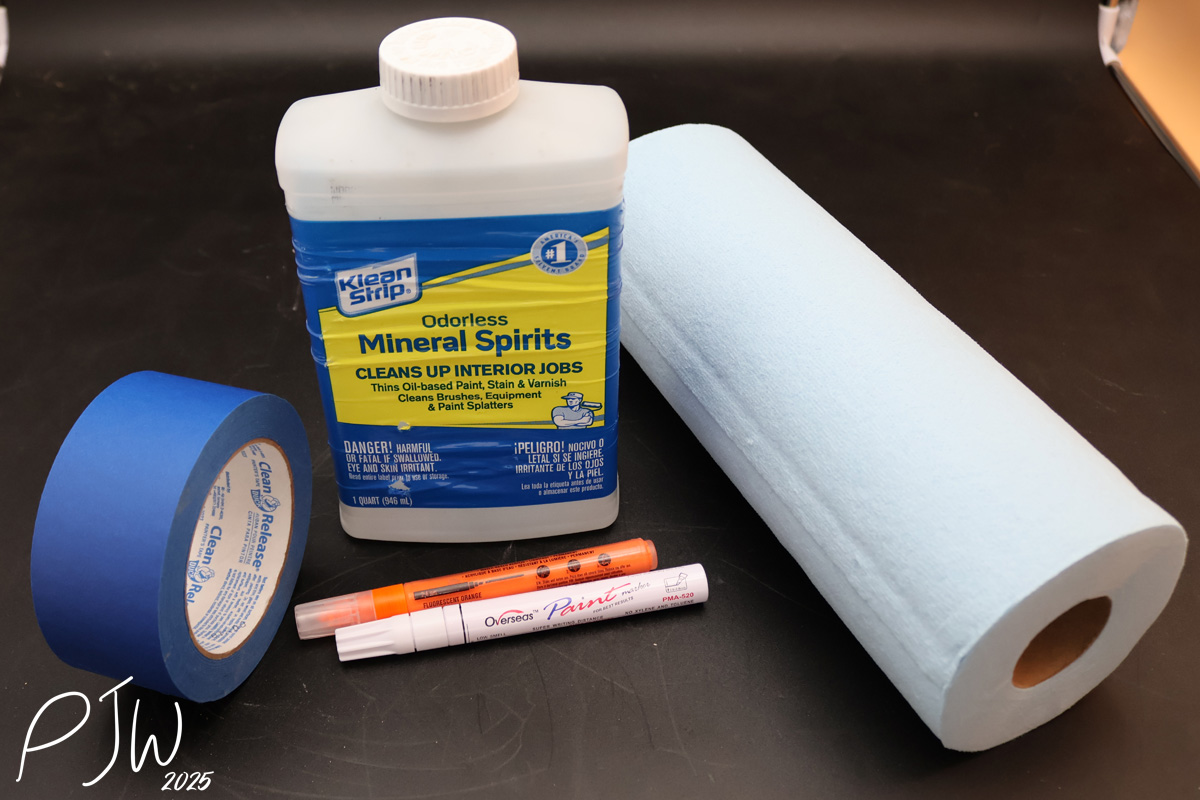
Essentially, we need a cleaner and rags, the primer and topcoat paint, and a way to keep the gun or slide from falling over. Masking tape helps to avoid overpainting and hitting the gun, but you can certainly paint without it (just requires a steady and or more cleaning afterwards).
I like paint pens, rather than nail polish or something similar. I’ve found the good paint pens to be easier to apply, and the paint itself holds up better to shooting & carry. The specific pens that I use are the Overseas Paint Marker (primer), and the Liquitex Orange Paint Marker (topcoat).
The process for painting your sights really isn’t hard, but it is time consuming.
The Paint Process
The process itself comes down to three parts, and a lot of waiting in-between.
- Cleaning
- Primer Coat
- Topcoat
This is not a complicated process, but it’s somewhat easy to screw up. One thing with painting sights is that if you botch some part of it, starting over isn’t hard, or that much of a pain to do. With painted sights (especially on carry guns), the paint will wear away and eventually flake off, so you’ll be doing this process again in the future anyway.
Let’s start with the most important step in the process, cleaning.
Cleaning
The first step is to clean your front sight. It’s as simple as taking a rag, dousing it with alcohol or mineral spirts, and wiping down the sight. I would recommend air drying for it, as using a clean rag can leave behind fibers that will make it harder for the paint to stick. That said, a lot of the microfiber cloths don’t do that, but I’d still err on the side of caution. Cleaning is paramount to get paint to stick, so we want to make sure that the sight is clean and dry before painting.
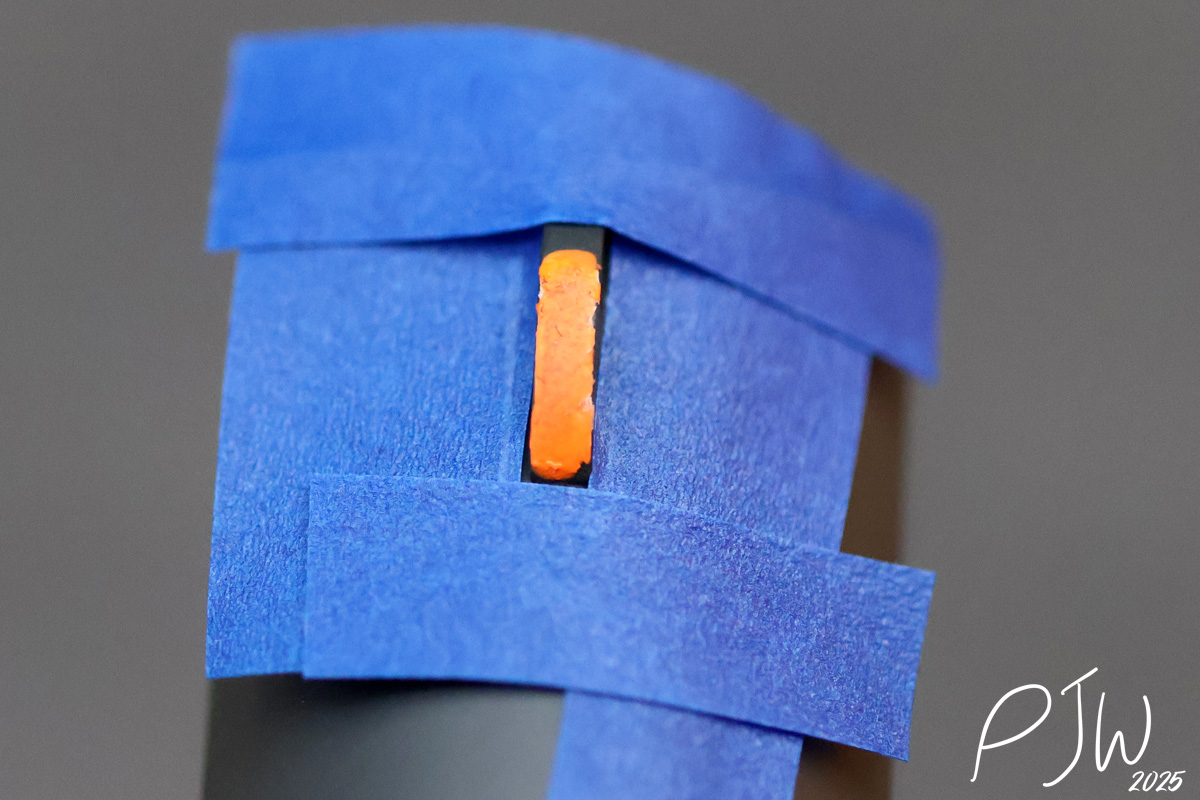
This would also be a good point to tape up your sight. It’s not required, but it’ll make the process less headache inducing. I’d also recommend prepping your paint pens here too (shaking them, testing out the head on a rag), as it’ll make the next two steps faster to complete.
Once we’ve prepped the sight, it’s painting time!
Primer Coat
Once the cleaner has dried, we can move onto doing our primer coat.
I generally apply a single layer of primer, as it tends to do a pretty good job of covering the front sight. Two coats may be required if it dries in a weird manner, but I’ve not run into that yet.
Once we’ve gotten sufficient primer paint on the sight and it has time to dry, we move onto the top coat.
Topcoat
Topcoat is the “make or break” for the sight. This is where it can be easier to screw up the process, as the topcoat will adhere to the primer paint. This means that if you have a heavy hand when applying paint, it can pull the primer off, and you’ll have to start over.
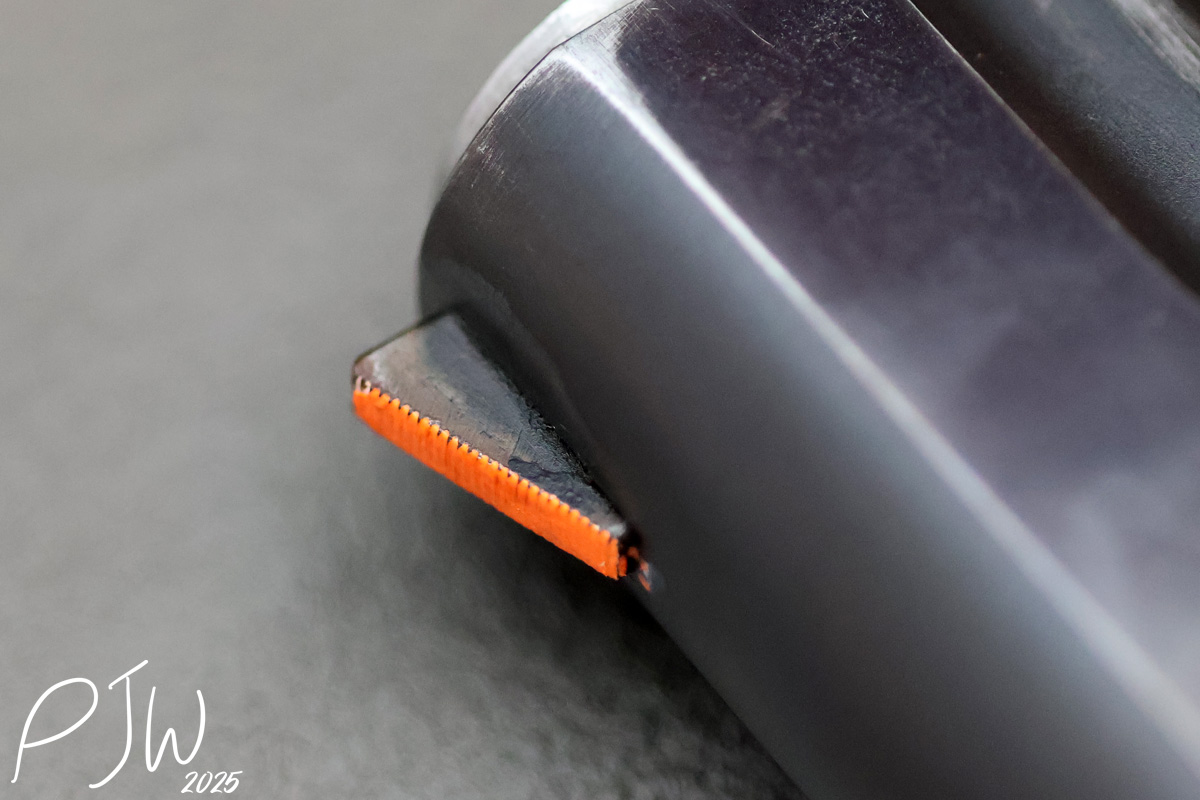
The key thing is time. Make sure that the primer is totally dry before you start, and take your time applying the topcoat. The paint will dry faster, as paint-on-paint seems to require less time than paint on the bare sight itself. You’ll likely need two layers of topcoat, but don’t fret if you need more. Once you’re done painting, let it dry, and then you’re totally done!
The Verdict
Putting paint on your sights is a classic way to improve visibility. If you don’t want to swap a set of sights (or physically can’t), some paint can make a world of difference. I’d certainly recommend giving it a go if you have a gun that could use it!
Video Work
I made a video showing the process that I use for painting my sights, and a little sneak preview at a project that is in the works.
Additional Reading & Patreon Link
If you’re looking at doing some good modifications to your guns, check out some of our related articles below:
- OT Defense StippleTec Stippling Kit Review – DIY Grippiness [2025]
- Modernizing the Defensive Lever Action Rifle [2024]
- Quick Tip To Improve Grip Texture [2024]
- So You Just Got An AR-15! What Should You Do To It? [2024]
If you’d like to support me on Patreon, I’ve got the link for that here. Nearly everything that I do on Primer Peak is paid for out of my own pocket, and my content is not shilled or driven by manufacturers or companies. If you decide to donate, I’d really appreciate it, as it would allow for me to continue to bring you quality work.


Great DIY article.
This brings back memories. Back in the day, I would use florescent fingernail polish to paint my front sights. More recently, i used a marker to black out the rear sights of my Glock 48. But I never went to as much trouble as the author. 🤭
Fingernail polish can work really well, I’ve just found a proper paint pen to hold up better to carry and use.
I wouldn’t say that I go through much trouble with my process. Just cleaning the sight, taping it up, and doing the painting!
Thanks for commenting Lee!