
Aggressive and grippy is how I like my pistols. My 1911s all have checkered MSHs, aggressive stocks, and some form of checkering or grip tape on the front strap. I’ve got G10 stocks on most of my revolvers for more grip. Hell, even my long guns (Beretta A300 and AP5) have more aggressive texturing on them. As such, I’ve wanted to add a more aggressive texture to my Glock frames for a long while. Back near the start of the year, I bought the OT Defense StippleTec Stippling Kit (on the recommendation of our own Sean B.), and decided to learn how to stipple my Glocks. How well did the kit work out, and how did the guns turn out?
Who is OT Defense, and What is their Stippling Kit?
OT Defense (Oregon Trail Defense) is an Oregon-based company that specializes in making and selling things to customize and modify guns and holsters. They’ve been in business for a long while, and tout their “Made in USA” on all of their products. I’ve heard good things about their Nub Mods for ALS holsters, but their Stippling Kit is my first experience with the brand.
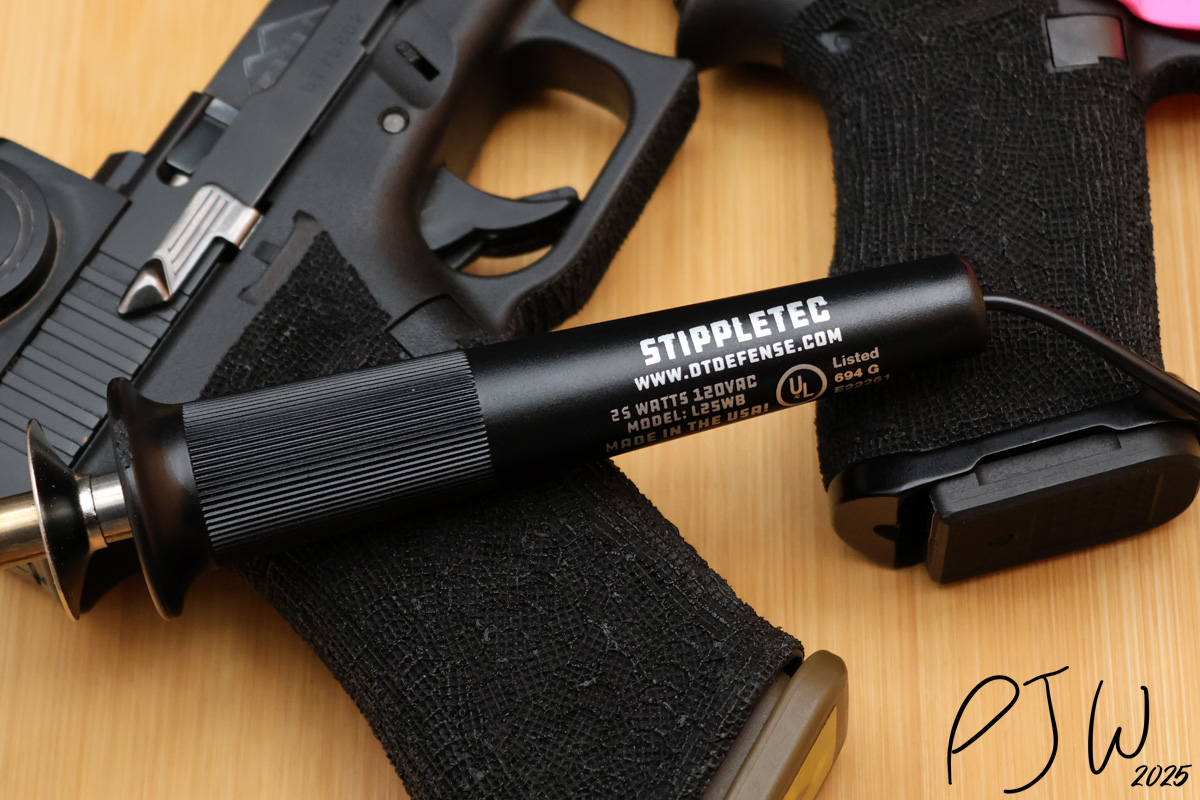
The OT Defense Stippling Kit is a starter kit for stippling handguns. It comes with a short shaft 25 watt burner, a bunch of stippling heads, a little stand for the burner, and a plastic travel case. OT Defense also includes a few cards of information for stippling tips, which actually came in pretty handy. All of the kit is US made too, which I can dig. Cost runs $65.99 for the kit, and I spent an extra $2 for a little case to carry the spare stippling heads, and $11 for a 20LPI finishing head.
The kit that I bought is their most basic one, however, they sell more complete ones. There are two more expensive kits, which come with brushes, more powerful burners, and more stippling heads. Based on my needs, I went for the least expensive kit. OT Defense sells every one of their stippling heads a-la carte too, so I planned to buy any extra heads as necessary.
Buying the kit was simple, and shipping was rather fast. However, the kit sat for a while until I was ready to start working on my Glocks. Why choose stippling over tape or something else?
Why Stipple?
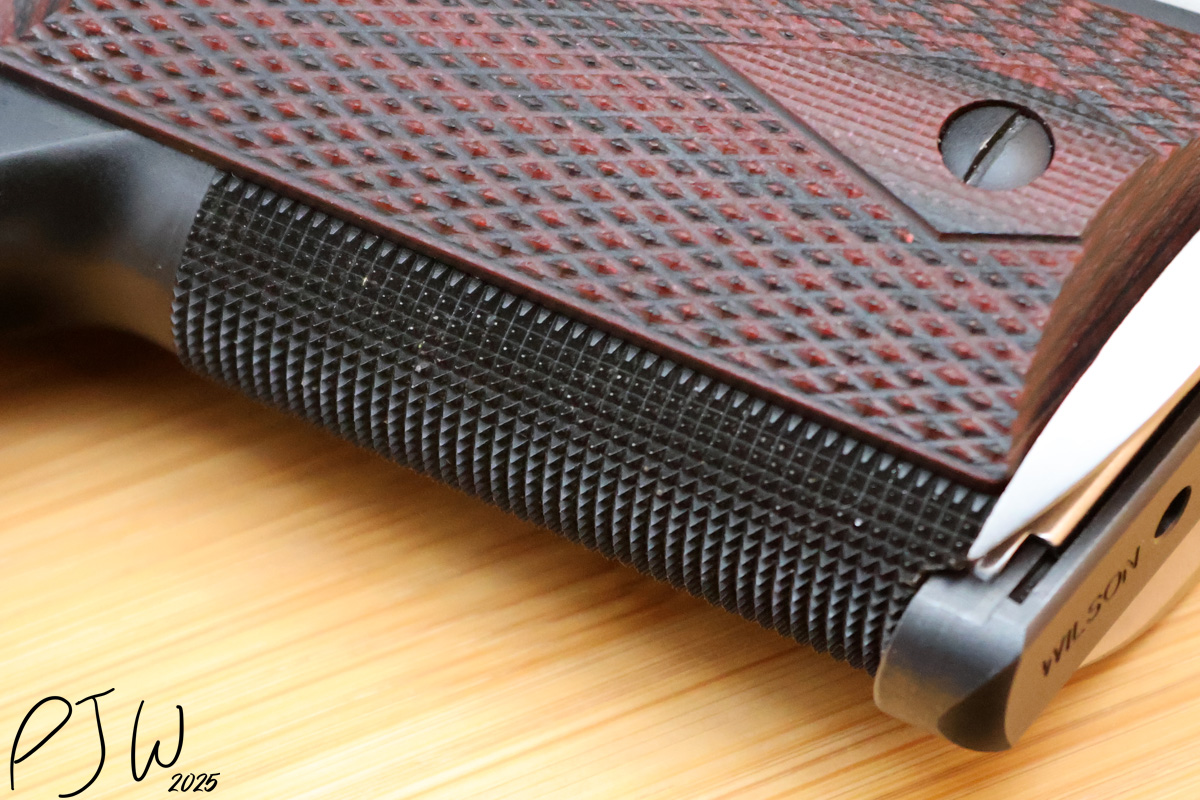
A lot of folks want to add more texture to their guns. You’ll see things like the Talon Grip Tape, skateboard tape, or hockey tape showing up on guns to give more grip. I like skateboard tape for a 1911’s front strap (as you can secure it using the stocks on the gun), but on the Glock (or similar polymer framed guns), I do not like tape.
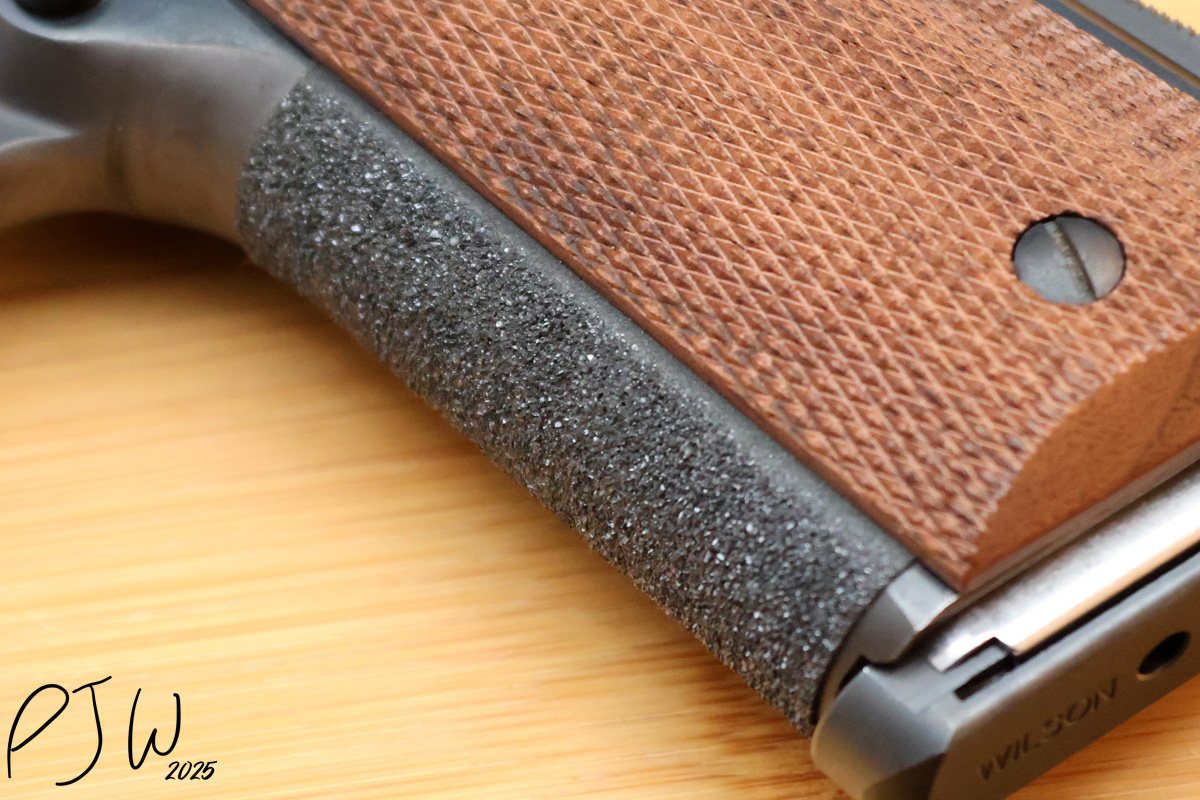
Tape can get gross pretty fast, and will get gummy as it mixes with sweat and oils. On top of that, it can move around a bit (more of an issue with Talon and skateboard tape), which could induce issues. I’ve seen shifting tape that slides over a the magazine release, causing the mag to drop from the gun under recoil. Aside from those issues, I’ve also found tape to generally not be as aggressive and comfortable as good stippling.
However, tape is not permanent, which is the draw. Stippling is going to be a permanent modification to the frame, and cannot be undone. There are concerns of warping your frame, if you don’t support it when stippling. It’ll void your warranty too, but that’s not a concern of mine.
How was the process of stippling my Glocks?
Stippling My Glocks
It took about 3 months for me to actually sit down and stipple my Glocks. Stippling is an art, not a quick process, and I didn’t want to botch it. I’m no stranger to working on guns, but stippling was a new type of work to do. As such, I did some preparation before getting right into melting my guns.
Preparation
To prepare for stippling, I did a few things. It’s one part material, and one part mental.
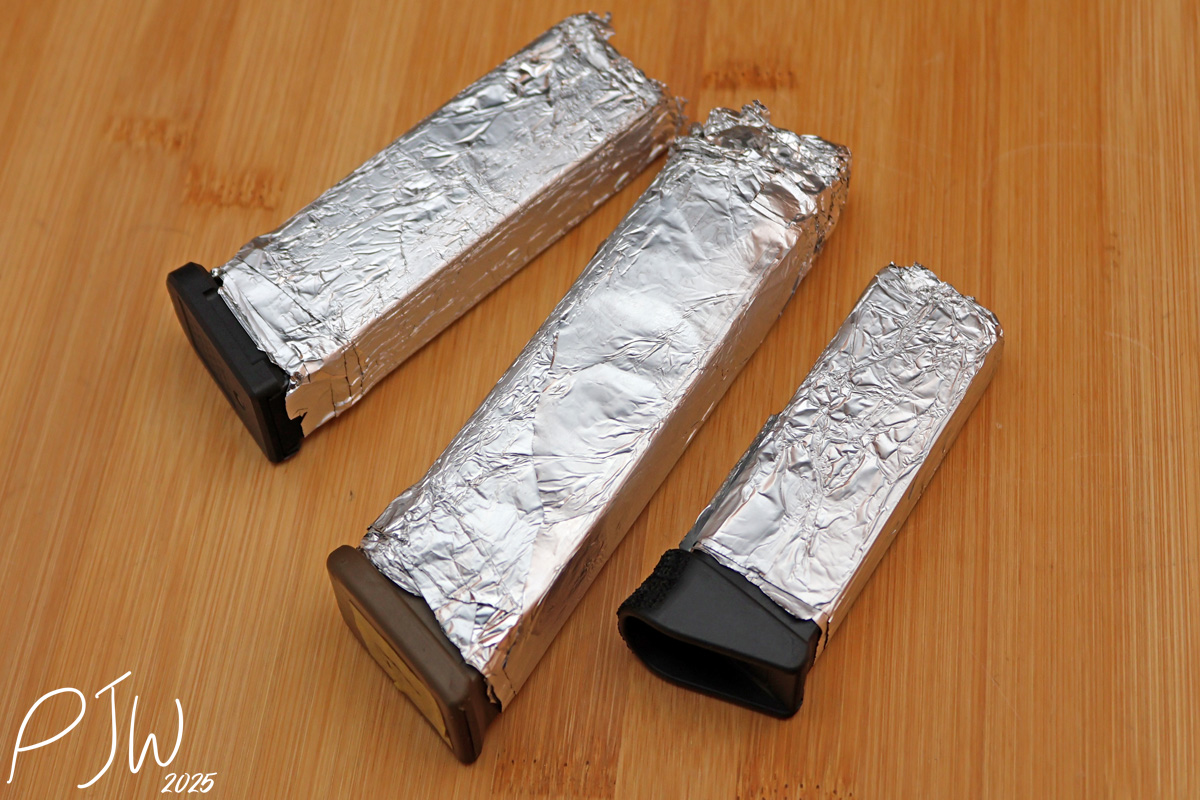
For materials, I’d recommend ample space to work on your frames (a clean workbench), good ventilation (a fan and open doors/windows), and a brush for cleaning the stippling heads. You’ll also want some foil tape or aluminum foil (to wrap a magazine), so you can prevent the frame from warping. The stippling burner has a reasonably long power cable, but an extension cord or being near a power outlet is very handy. Good lighting is also very handy, as you’ll want to be able to see (in great detail) what you’re stippling.
Mentally, you’ve gotta focus on taking your time. This is not a job to be rushed, as it’s time + heat + pressure that determine how the job turns out. I would recommend doing your stippling when you know you won’t have any major interruptions. You can certainly stop and come back to finish the frame, but doing it with some serenity will help out. Taking short breaks is helpful though, as you’ll probably get sore forearms while stippling your gun. Some good music or a podcast or video to listen to will make the process less tedious too.
I did not find the stippling process to be particularly hard or stressful, but I’m pretty chill while working on projects. I did get some practice in before starting to work on my guns though.
Practice Makes Good Enough
I’ve heard a lot of folks recommending to practice stippling on various things before getting to work on a gun. Magpul PMAGs, scope caps, knife scales, and more. However, something that is the same material and blend as your gun will be the best. OT Defense sells chopped up frames that you can buy to practice with (not legally usable firearms anymore, so they can ship right to your house), but I used OEM Glock magazine floorplates. I had about a half dozen floorplates laying around after adding extensions to some Glock 42 mags, so I was able to practice with those.
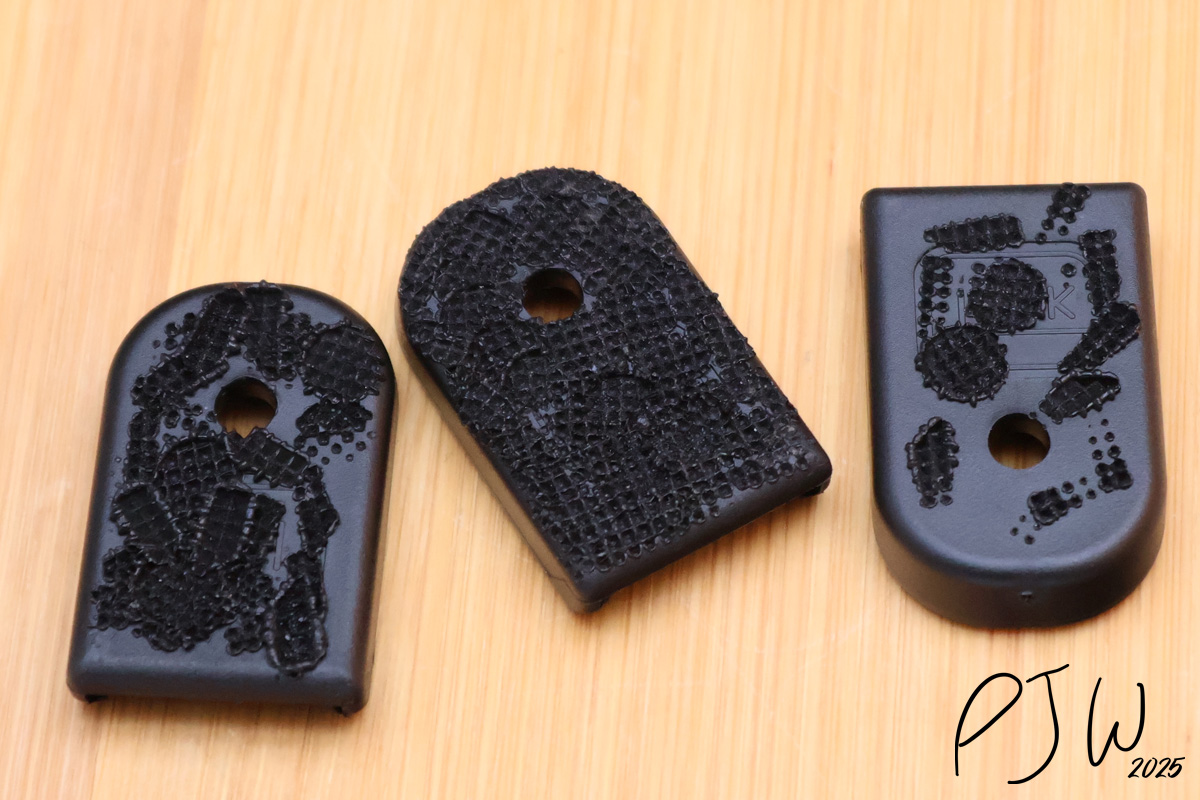
I’d recommend practicing time and pressure. How long do you need to keep the burner on the plastic to get the texture that you like? How hard do you need to press to get that texture too? It’s a simple hack, but it’ll build some good confidence for when you work on a gun.
Once I got my workbench ready, and did some practice, I got right into stippling my first pistol.
Actually Stippling My Glocks
Actually stippling the guns was really not that hard. I know that it might sound like it should be, but after practicing and reading up, actually doing the stippling wasn’t that hard.
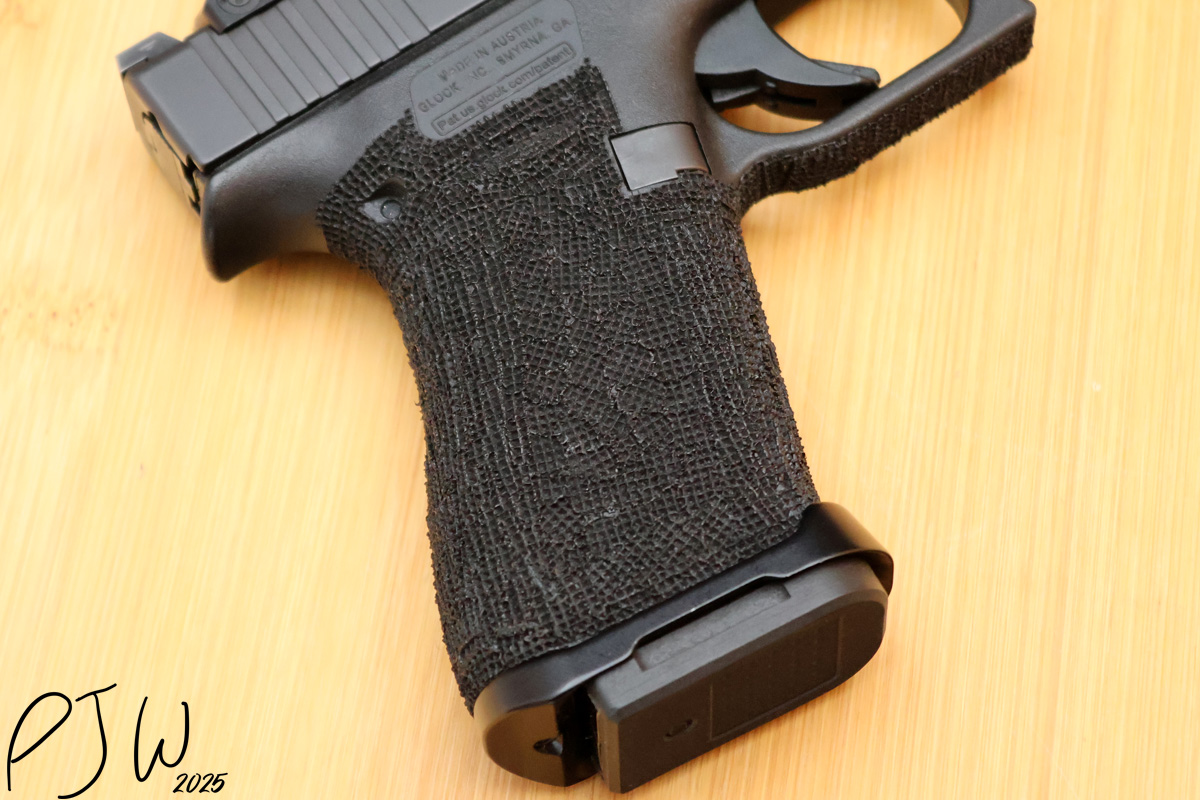
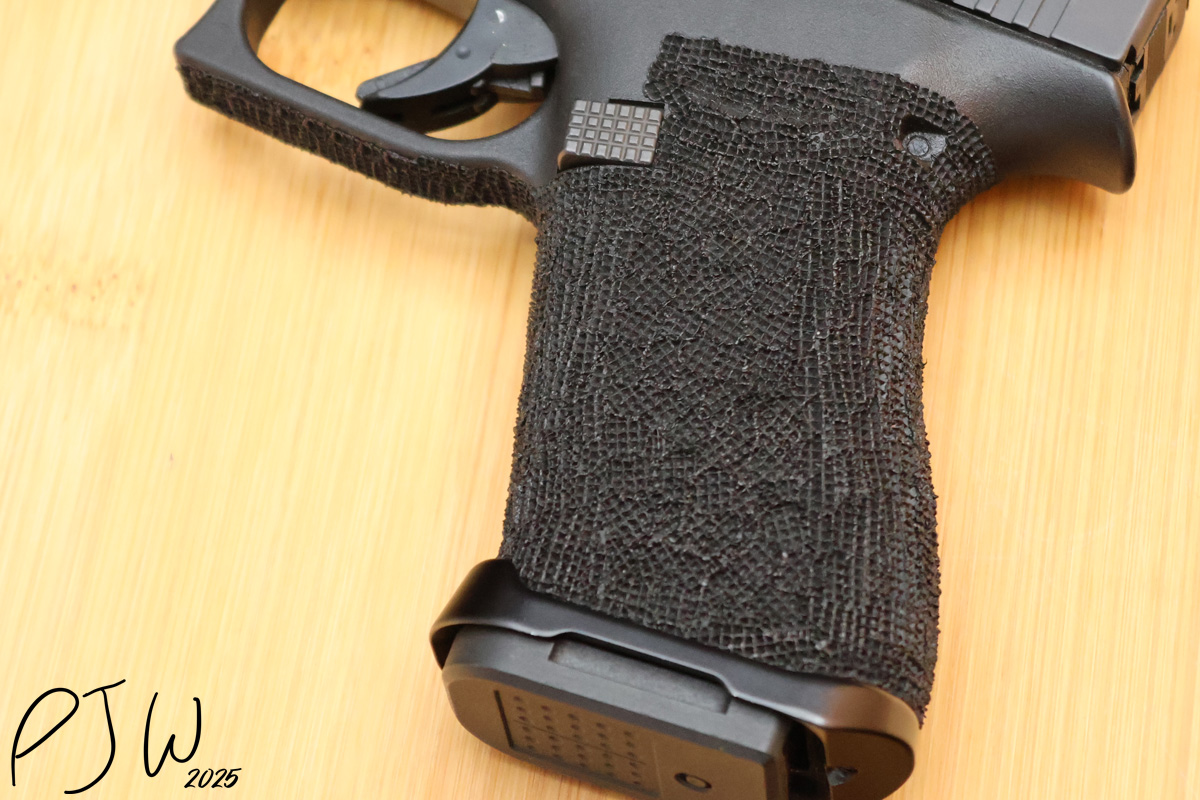
For all of the guns (aside from the G42), I took the same route to stipple them. I removed the mag releases (makes getting the wrapped mag into the gun easier), and removed the magwells from the guns that had them. From there, I started with a 20 LPI circular head for the left and right sides of the frame, and then switched to the straight 20 LPI finishing head for the rest of the gun. I found that this lead to a consistent pattern, and made the process easy to do. On the G42, I used the finishing head for the entire frame, since the frame is quite small.
This did mean that I spent more time on each gun, as the 20 LPI finishing head is smaller, and put less pattern into the gun with each press. However, I was able to be nice and precise, and to get a great pattern onto each frame. On spots like the higher-sides of the frame, the corners, and the trigger guard, the 20 LPI head especially worked fantastically.
It took me three days to stipple my five guns, with about 3 hours of time per gun. How did each gun turn out?
The Finished Product
I had five Glocks to stipple, and I’m quite happy how they all turned out. 4/5 of them have black frames, with my G42 being the FDE outlier. I mention this, as it melted a little differently than the black polymer does. After doing all of the guns, I did go back and do some touchups here and there on all of them. Shoring up certain angles, blending contours, and things like that.
I’ll be showing the guns in the order of which I stippled them.
Glock 48
My old Glock 48 was my first gun to stipple. I did have warping on the frame during my stippling, due to not enough foil on the magazine in the gun. Un-warping the gun was pretty easy, and just required some light heat from my heatgun, and wedging the foiled mag into the gun to open it up. No undo wear or damage there.
I started off pretty conservatively for the vertical height of the stippling, but ended up going back and going higher on the frame on Day 2 of stippling. The slim guns are pretty thin near the top sides of the frame, so I didn’t go as high as I did on the full size guns. That said, the new texture is excellent, and makes the gun much grippier in hand.
Glock 17 Gen 2

My old Gen 2 project gun was in dire need of more texture. The older polymer was slicker than the new stuff, and 35 years of oil and gunk have slicked it up even more. I’ve deep cleaned the frame a number of times, but the polymer was slick regardless.
The stippling did a massive upgrade to the frame. It’s grippy and fantastic now. No warping issues, no uneven spots, just came out pretty good. I was able to hide & blend some damage to the frame from long before I got it, and now it just looks and feels better in the hand. I’m on the fence about it, but I may stipple parts of the Rogers Magwell that I’ve got on the gun, but we’ll see.
Glock 42
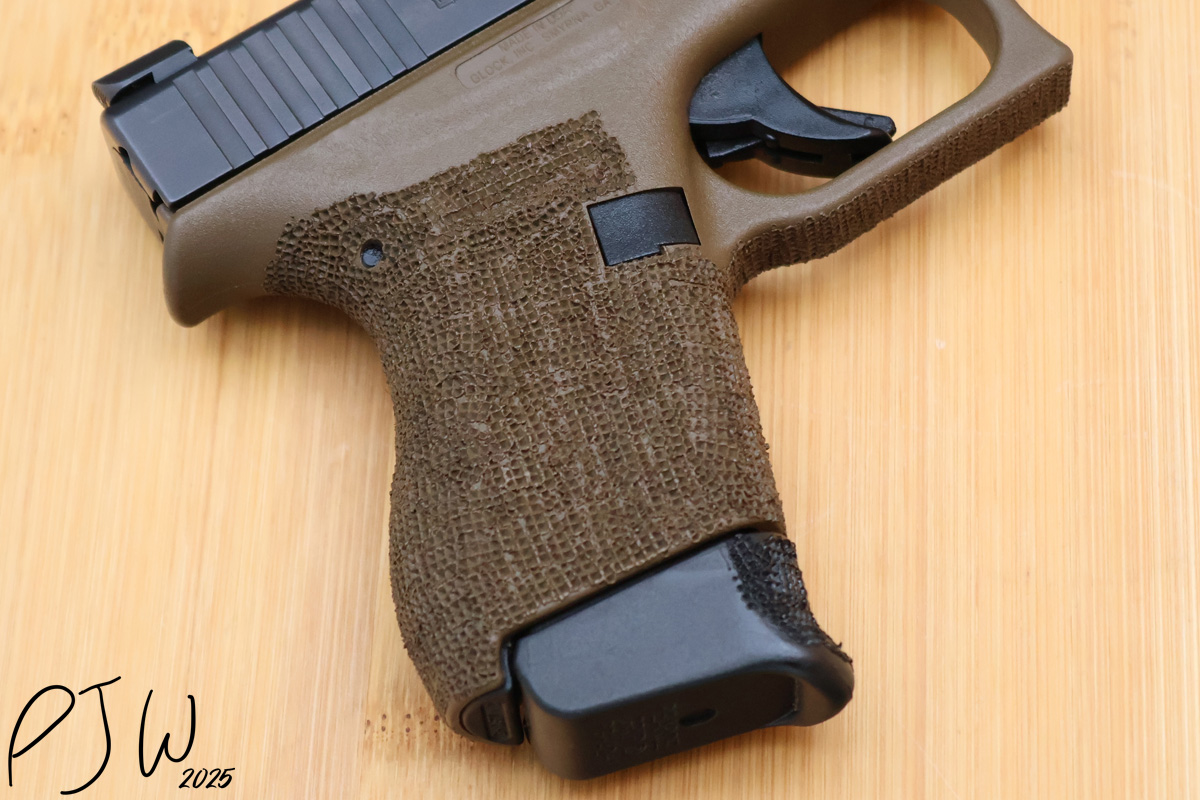
The 42 was a bit of an oddball gun to stipple. The FDE polymer started melting much faster than the black frames, so I needed to have a lighter hand while doing the work. It added some more time to this specific gun, but it was not hard.
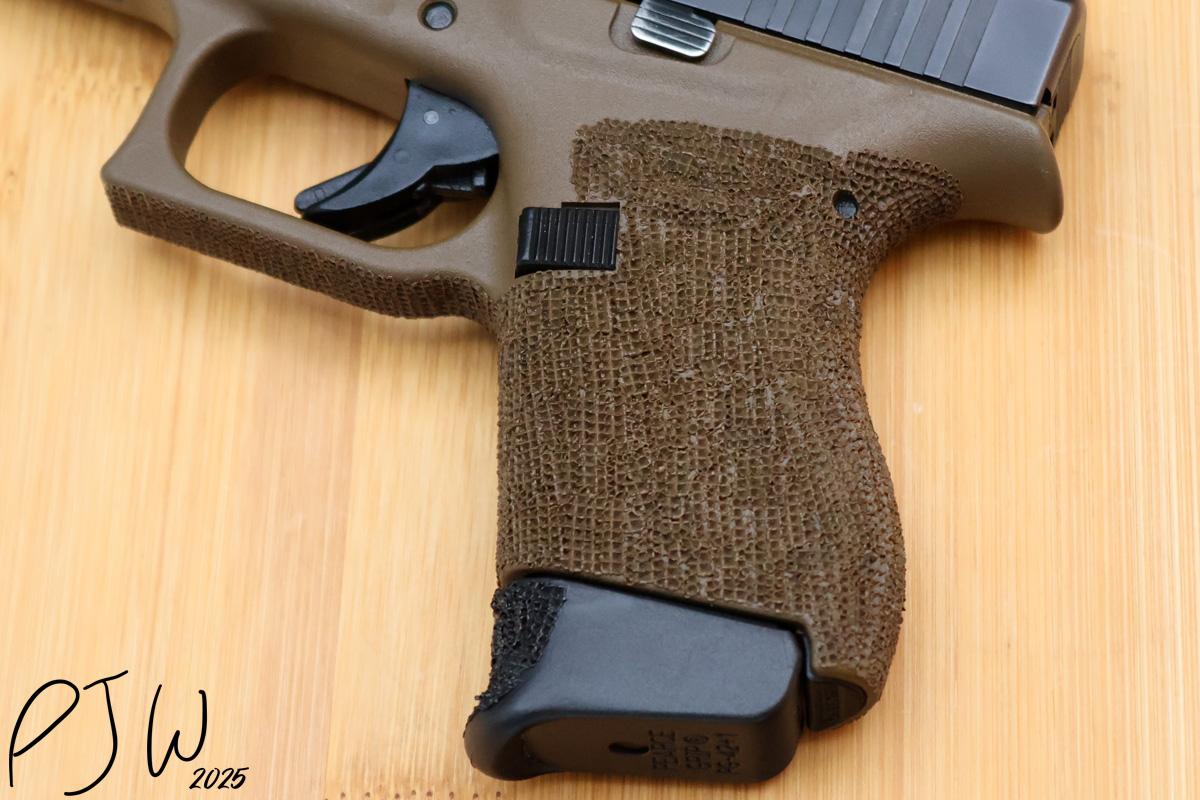
I ended up using the 20 LPI finishing head for all of the G42, due to the small size. It’s extra grippy in hand (common theme) but with this tiny gun, I think it has made the biggest difference of the bunch.
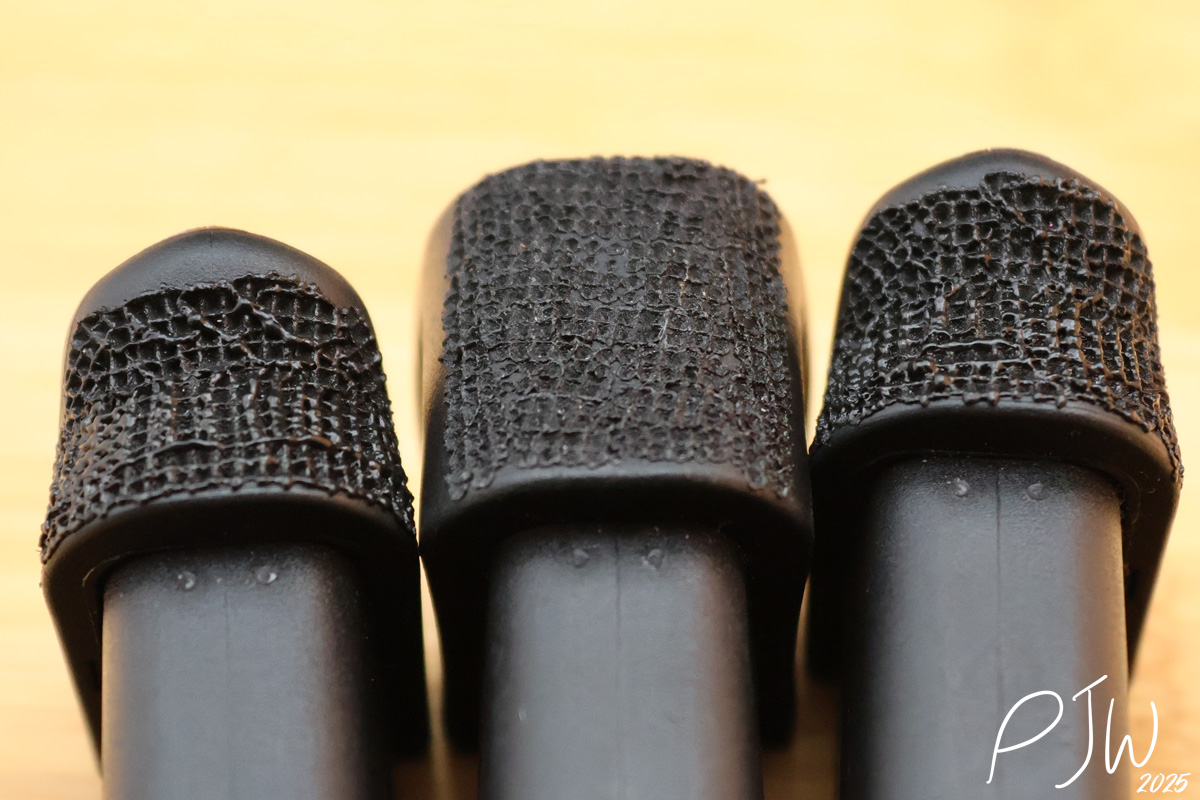
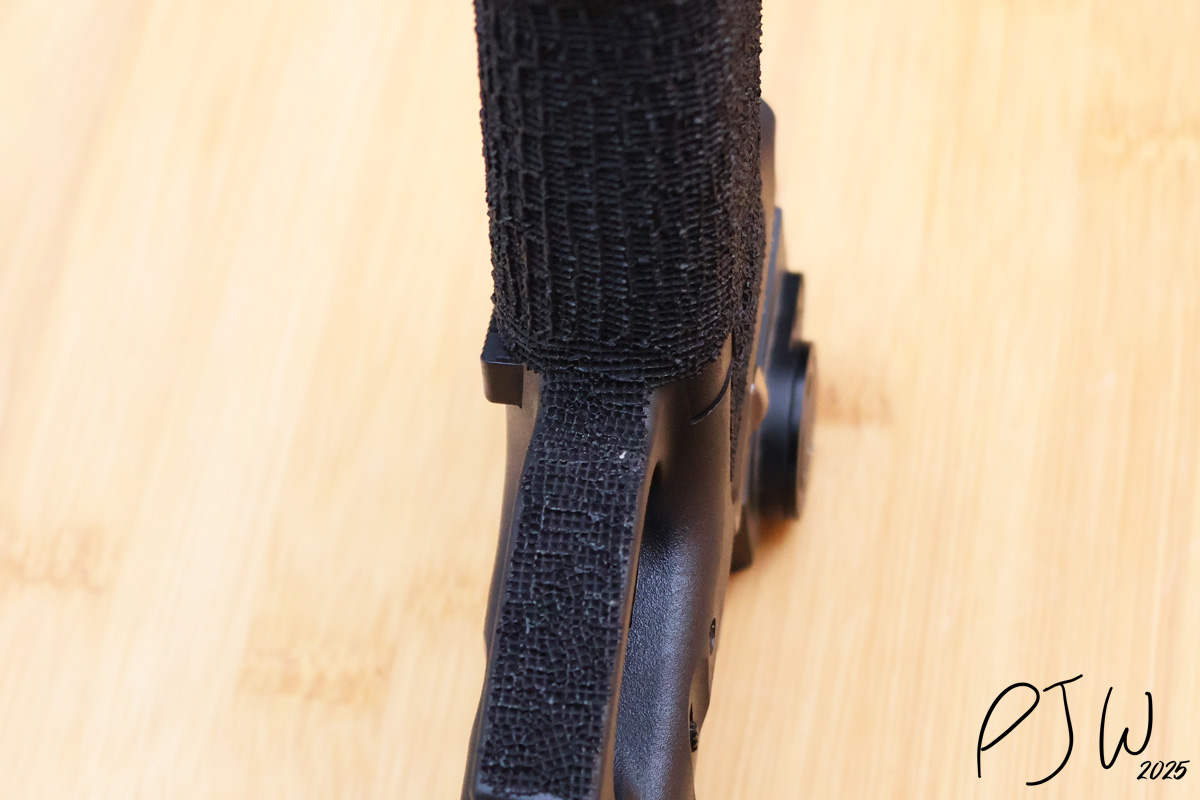
On top of stippling the frame, I also stippled my magazine extensions. I use the Pierce +1s and the Vickers +2s, both of which give you a pinky grip. A little extra stippling on these also gave a ton more felt grip on the gun!
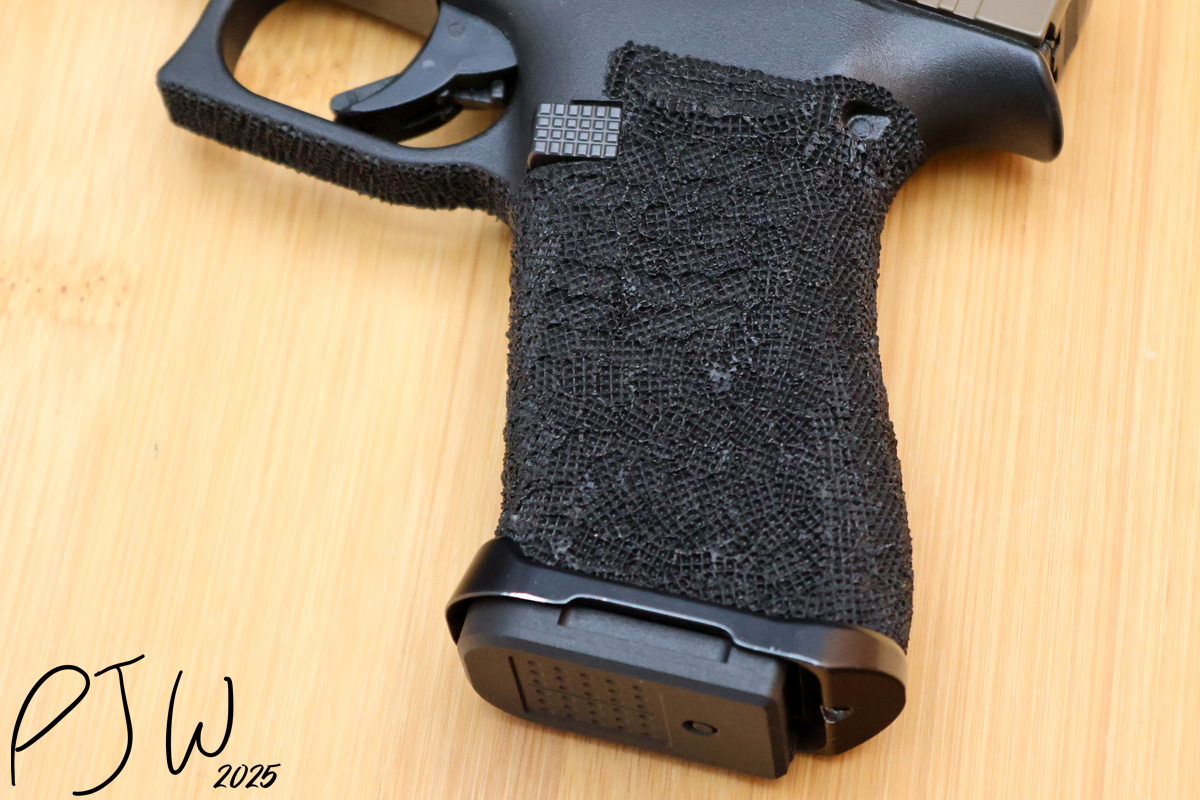
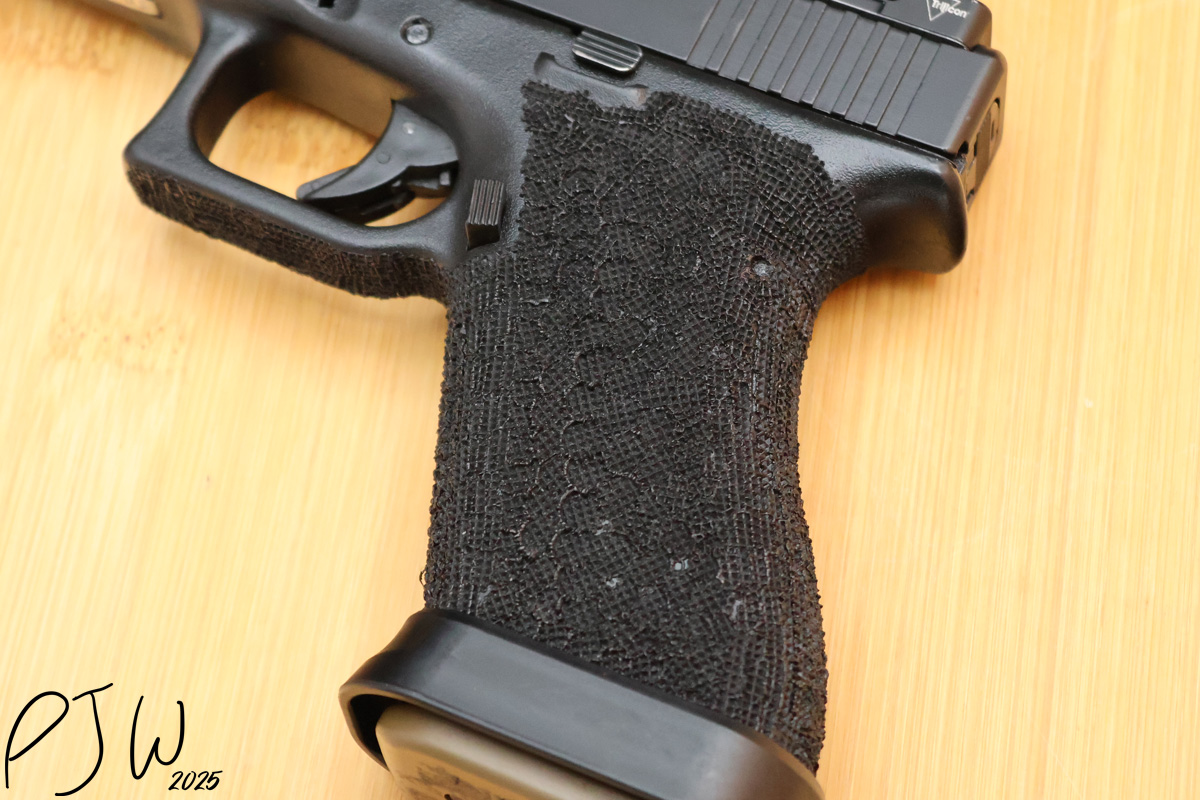
Glock 45

By the time that I got to the G45, I was very, very confident in the work. I got into the groove on the third day of stippling, and the G45 turned out pretty good.
Much like the G17, the stippling was able to go high up the sides of the frame. The G45 had the best OEM texture of the guns that I’ve got, but the stippling added even more grip. Since my G45 is sans-magwell, the bottom of the frame can show the stippling work that I did to it.
My G45 was already a gun that felt like a cheater pistol, with how easy it is to shoot. The extra stippling just made it even easier to use.
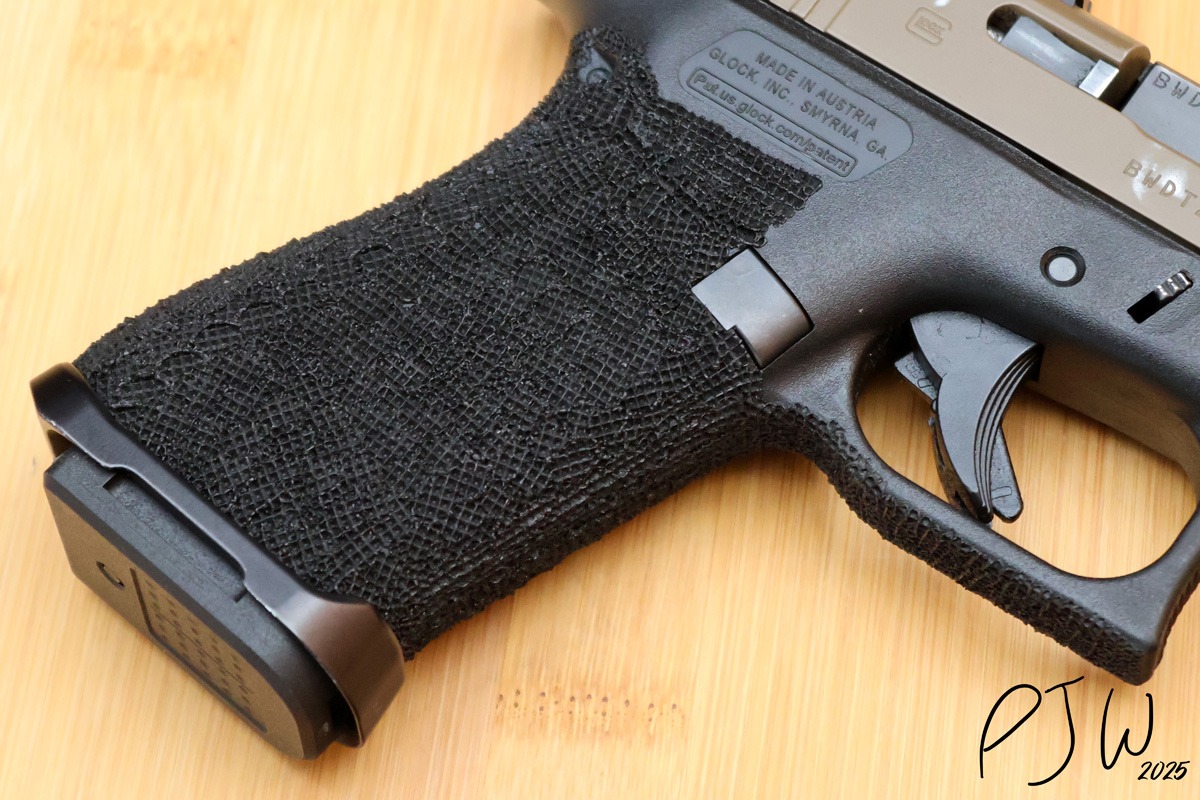
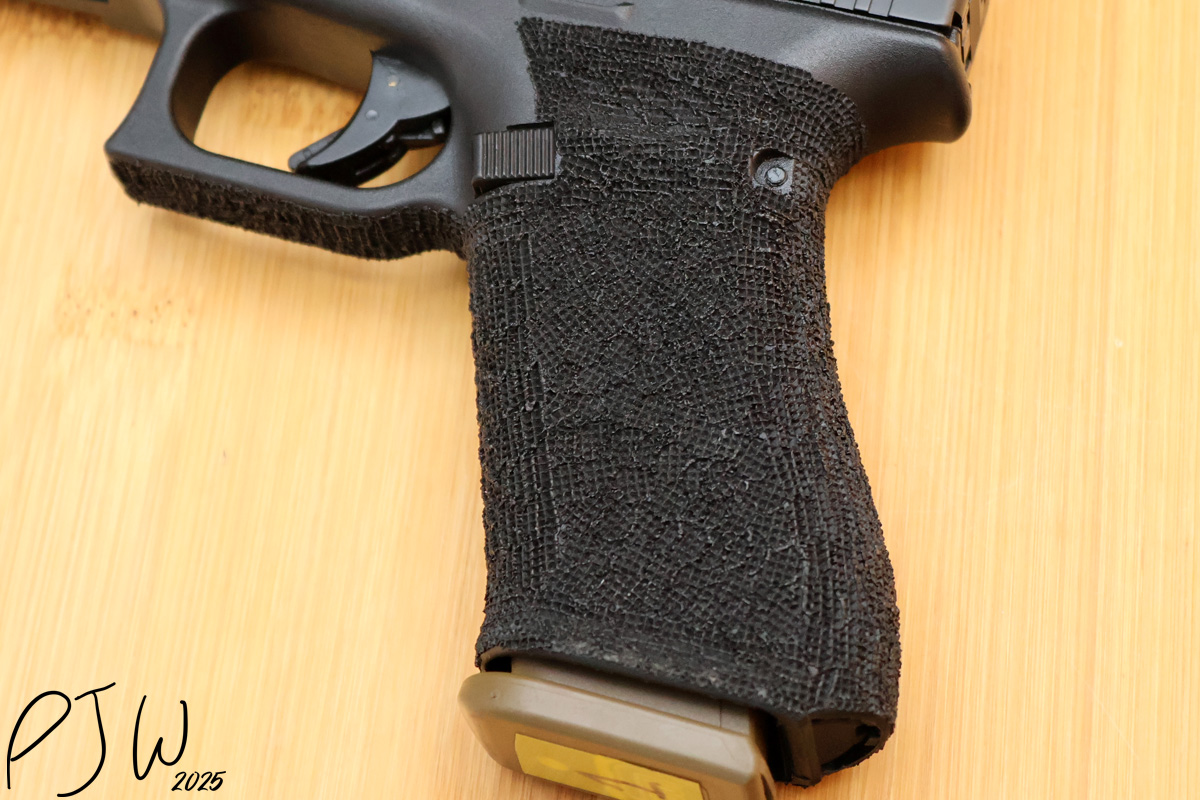
Glock 43x
My 43x was the last gun to stipple, as it is the gun that I’ve been carrying the most. All of the lessons learned from the first 4 guns went into the 43x, and it was the easiest gun to stipple.
Not much to say here. It went fast (only about 2 hours to stipple and blend with the magwell), and it turned out great. No warping on the frame as I learned my lesson with the 48, and have had no issues with the gun
The OT Defense StippleTec Stippling Kit (quite the mouthful) certainly made this process easier. This makes The Verdict pretty easy too.
The Verdict
If you’re thinking about stippling your gun, I would certainly recommend the OT Defense Stippling Kit. It gives you everything you’d need to stipple the gun, and more stippling heads can be bought a-la carte. Will your work be as good as a professional stippler? Probably not. Will it cost a whole lot less money and not require sending your frame off? Yep!
Stippling is not a task to rush, but it’s one that I’ve enjoyed doing, and enjoy the results of. The OT Defense kit made that task even better for me to take on.
Video Work
I’ve got a video review of the kit linked below:
Additional Reading & Patreon Link
Looking to mod your Glock? Maybe some new accessories? Check that out here:
- Glock 48 Review – A Pint Sized Glock 19
- Shield Arms Glock 43x/48 Carry Magwell Review
- Glock OEM Magwell Review
If you’d like to support me on Patreon, I’ve got the link for that here. Nearly everything that I do on Primer Peak is paid for out of my own pocket, and my content is not shilled or driven by manufacturers or companies. If you decide to donate, I’d really appreciate it, as it would allow for me to continue to bring you quality work.


1 Trackback / Pingback